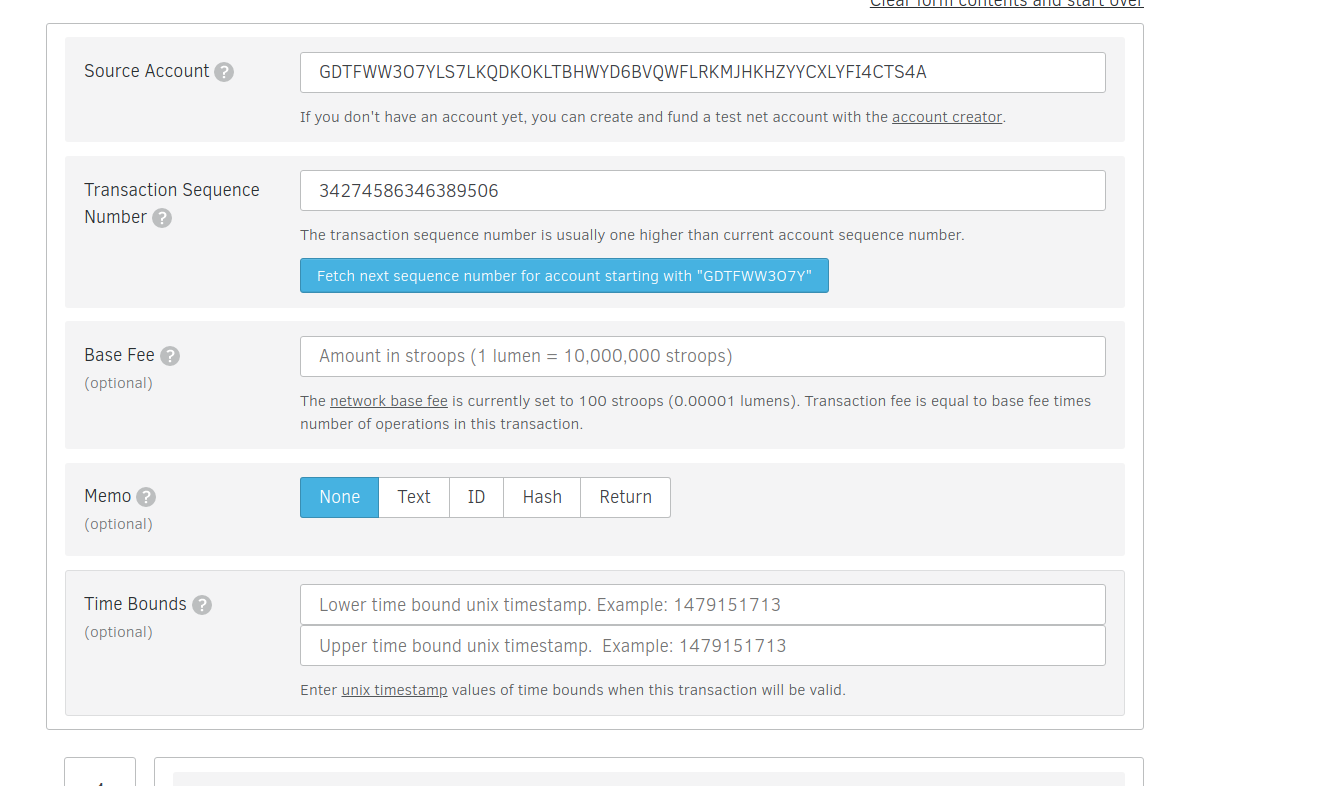
The steps below will be for a test account on the test network. However, if you’d like to do this on the public network, the steps are exactly the same. The only difference is that when using stellar.org’s transaction, you’ll change from test to public on the top right corner of the page. Also, details on how to buy stellar lumens and fund your accounts on the public network can be found through this link (https://aeonsoftware.github.io/2018/03/19/buying-your-first-lumens.html)
An Initial Coin Offering, also commonly referred to as an ICO, is a fundraising mechanism in which new projects sell their underlying crypto tokens in exchange for bitcoin and ether. It’s somewhat similar to an Initial Public Offering (IPO) in which investors purchase shares of a company.
Most ICO’s are usually launched on Ethereum but of late a number of companies have started launching their ICO’s on the stellar network.
This guide will take you through a detailed step by step process on how to create your first ICO on stellar.
1. CREATING THE ACCOUNTS
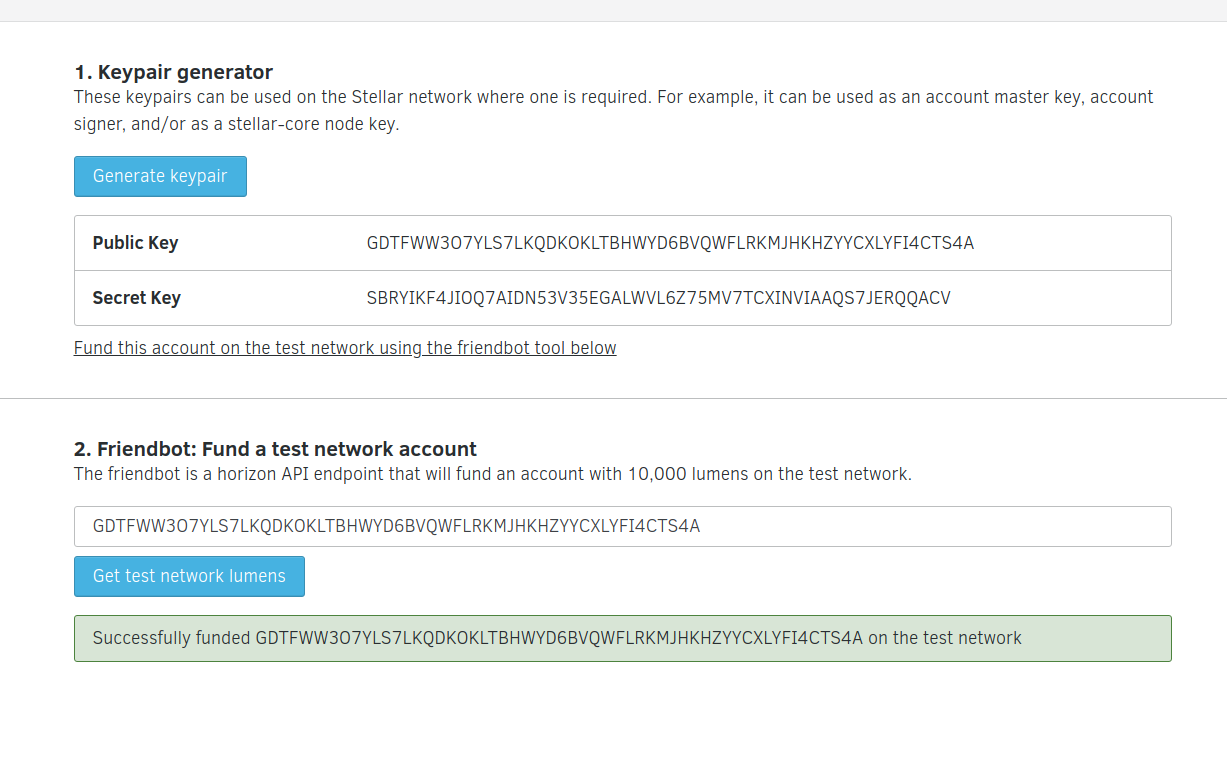
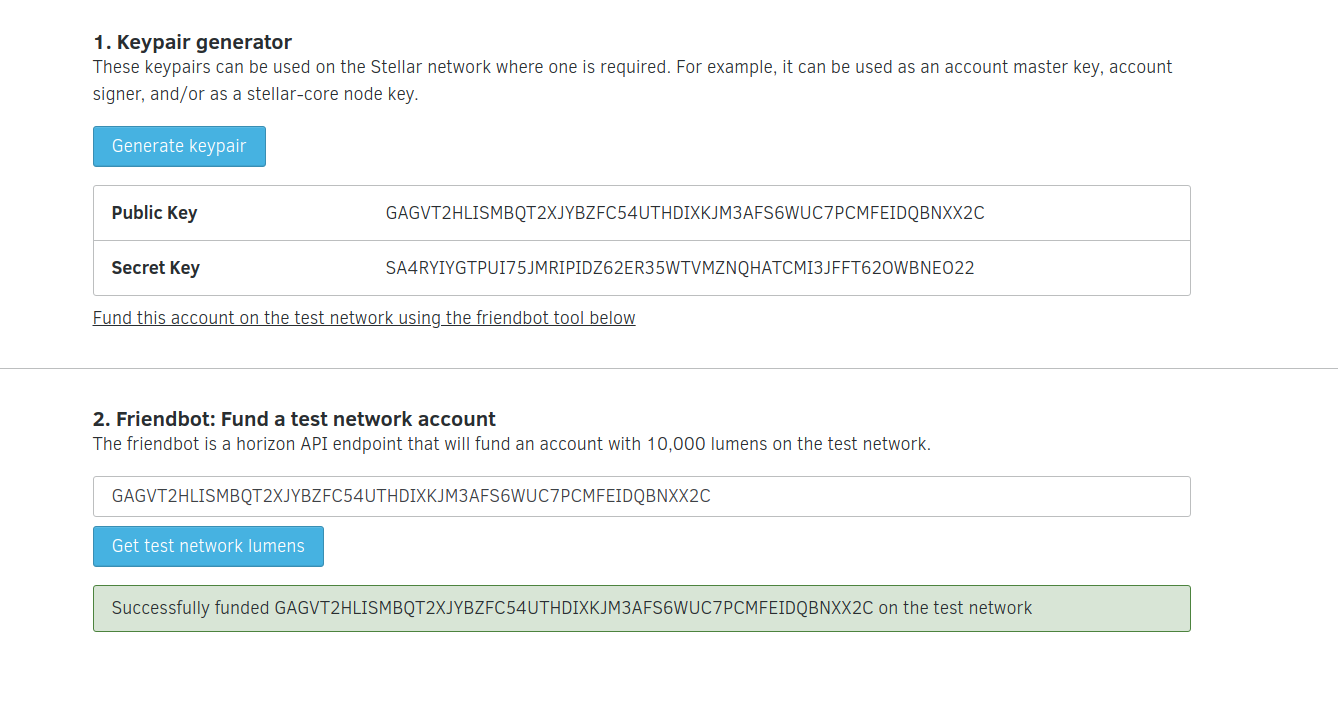
Go to the stellar dashboard and generate three accounts(https://www.stellar.org/laboratory/#account-creator?network=test)
The first keys generated will be for your issuing account.
The second keys generated will be for your distributing account.
The thrird keys generated will be for your investor’s account.
For each account you generate, note down both the public and private keys on a note editor as you will need them.
Also make sure you fund both accounts using the tool below the generate keypair button by clicking on the “get test network lumens” button. An account must have funds on the stellar network for it to be active.
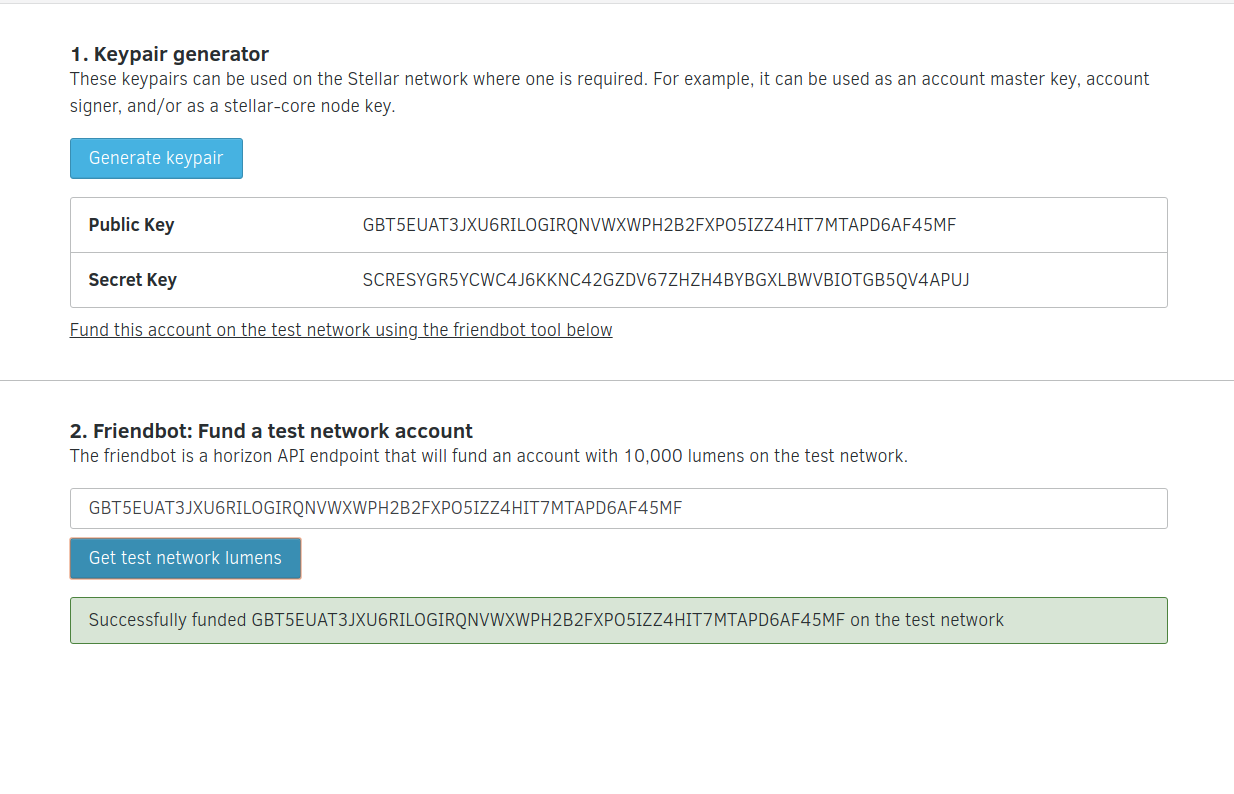
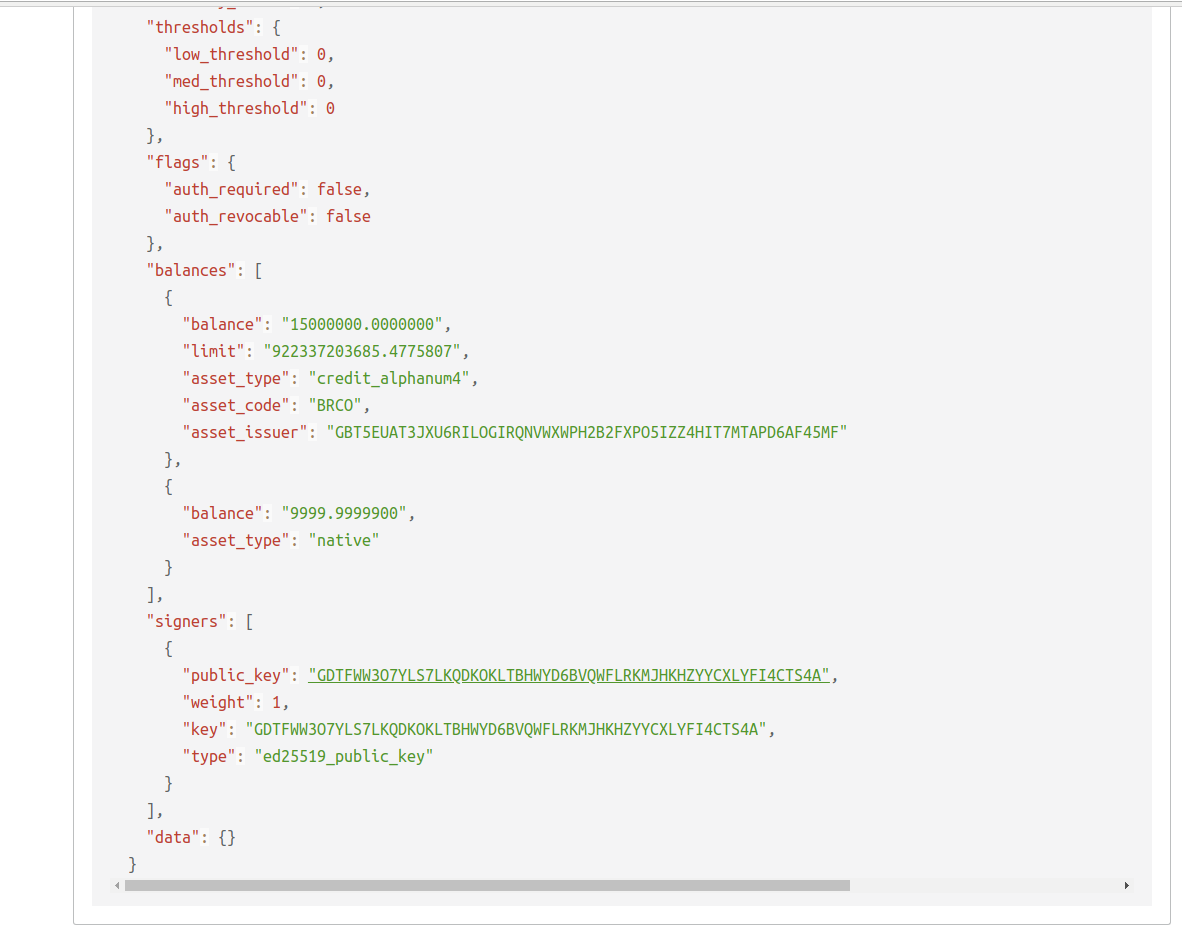
issuing account
Public Key GBT5EUAT3JXU6RILOGIRQNVWXWPH2B2FXPO5IZZ4HIT7MTAPD6AF45MF
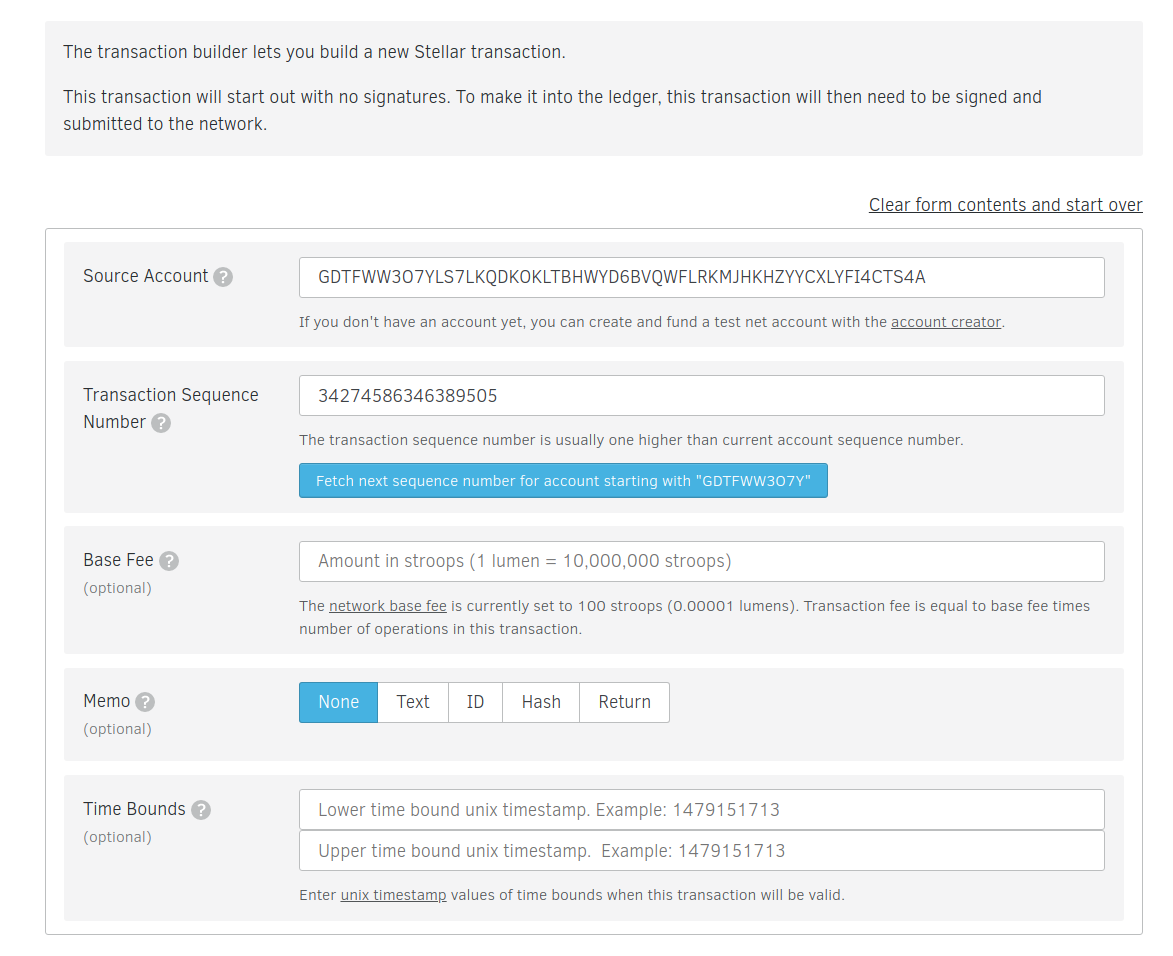
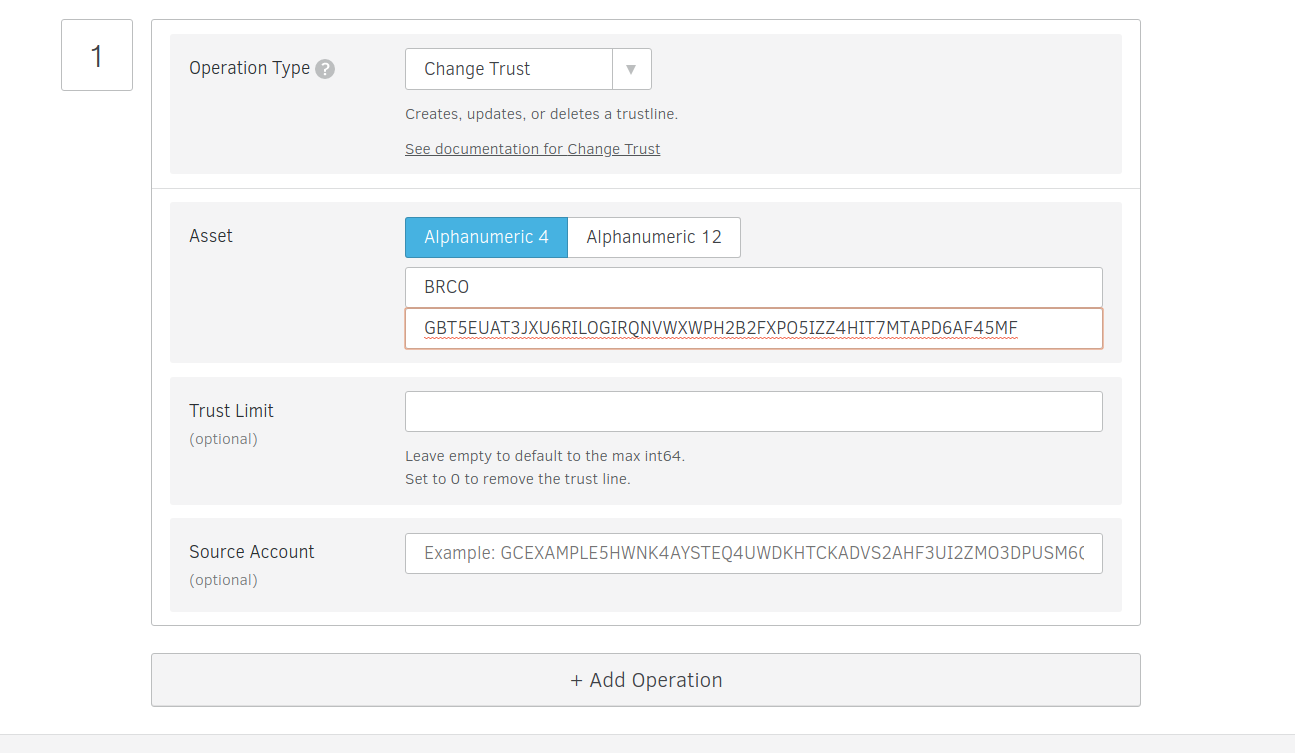
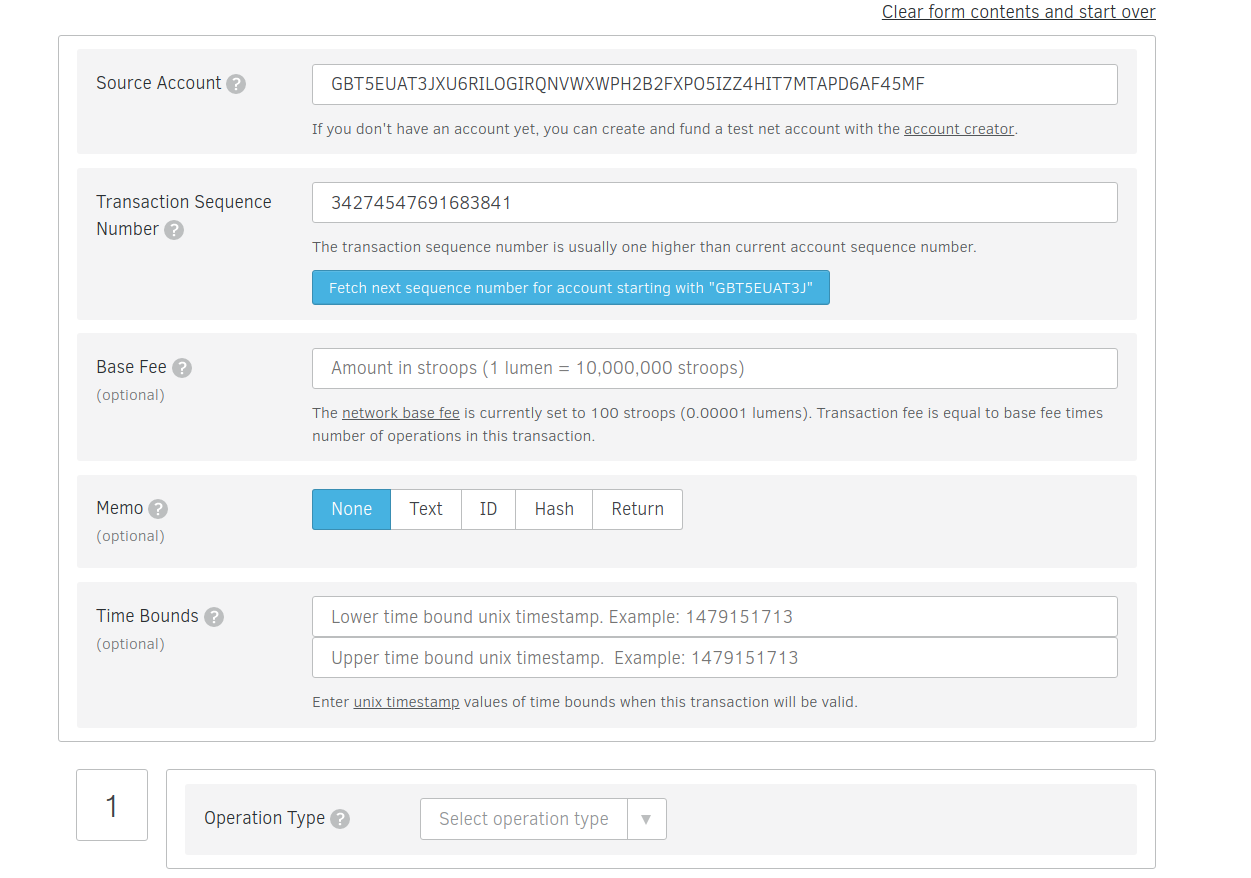
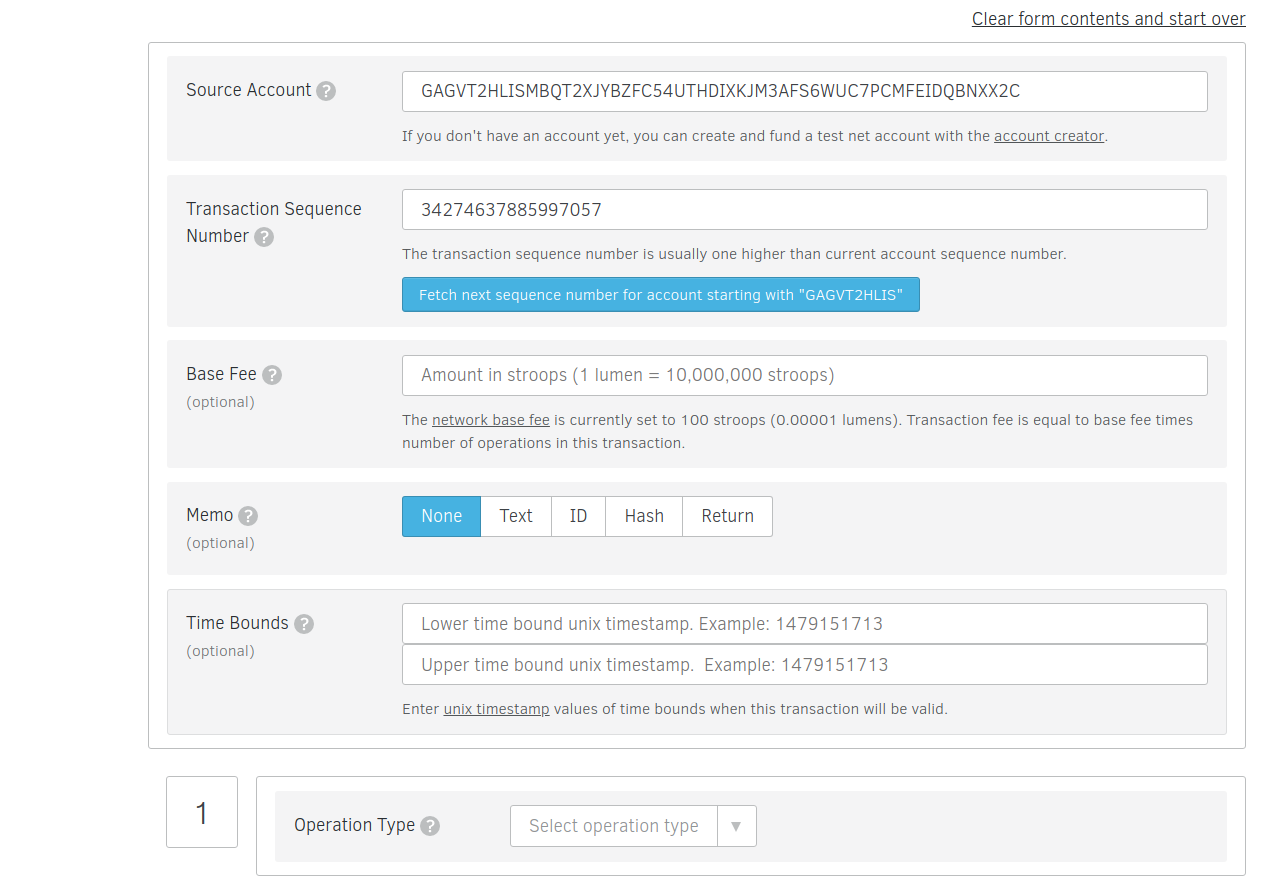
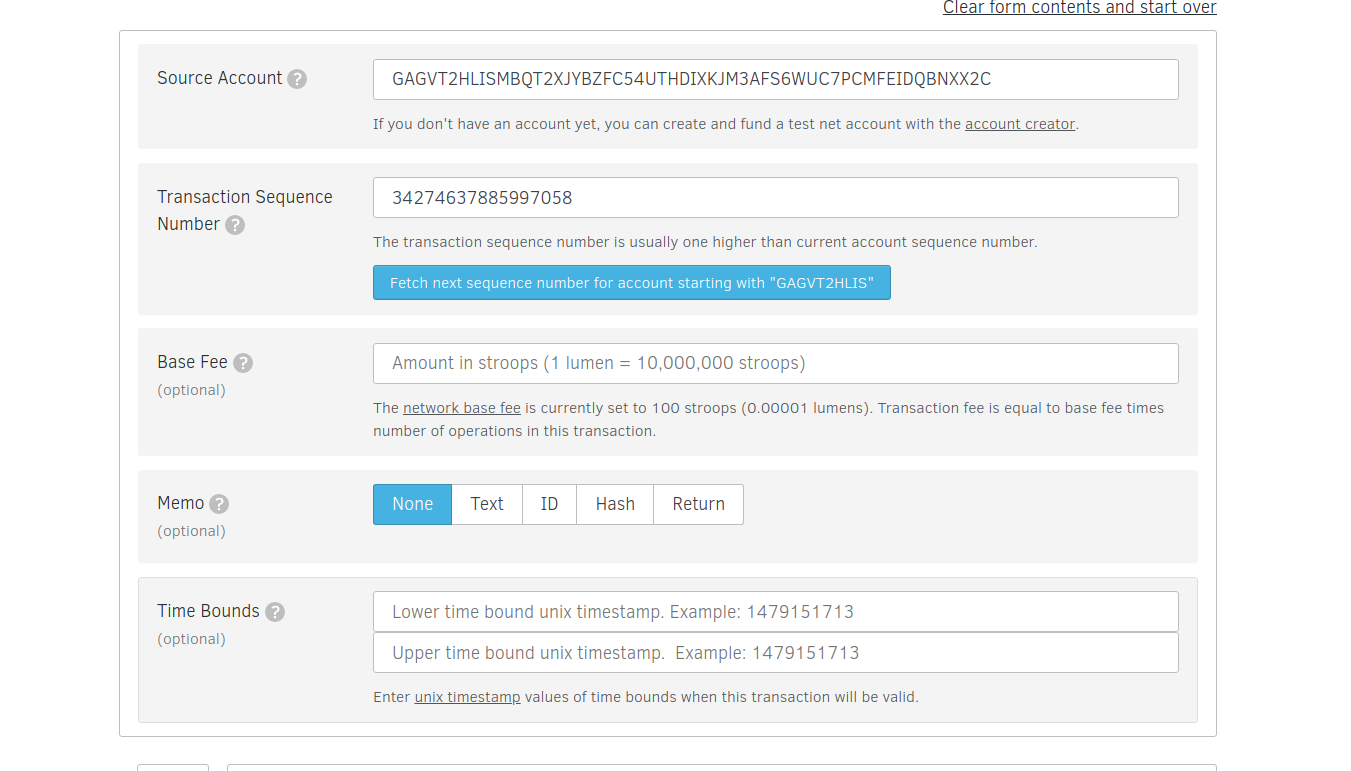
Head over to the stellar labs transaction builder. We’ll use this to fill out a form that’ll make our distributing account trust our issuing account(https://www.stellar.org/laboratory/#txbuilder?network=test).
Use the Distributing account’s public key as the source account.
Click the “fetch sequence number ..” to get the next sequence number for your account.
Leave the next few options blank and skip over to the operation type and select change trust.
Click either the 4 or 12 Alphanumeric, depending on how long you want your asset code to be and then set it to whatever you want it to be. I set mine to BRCO.
Set the Issuer account ID to our issuing account’s public key.
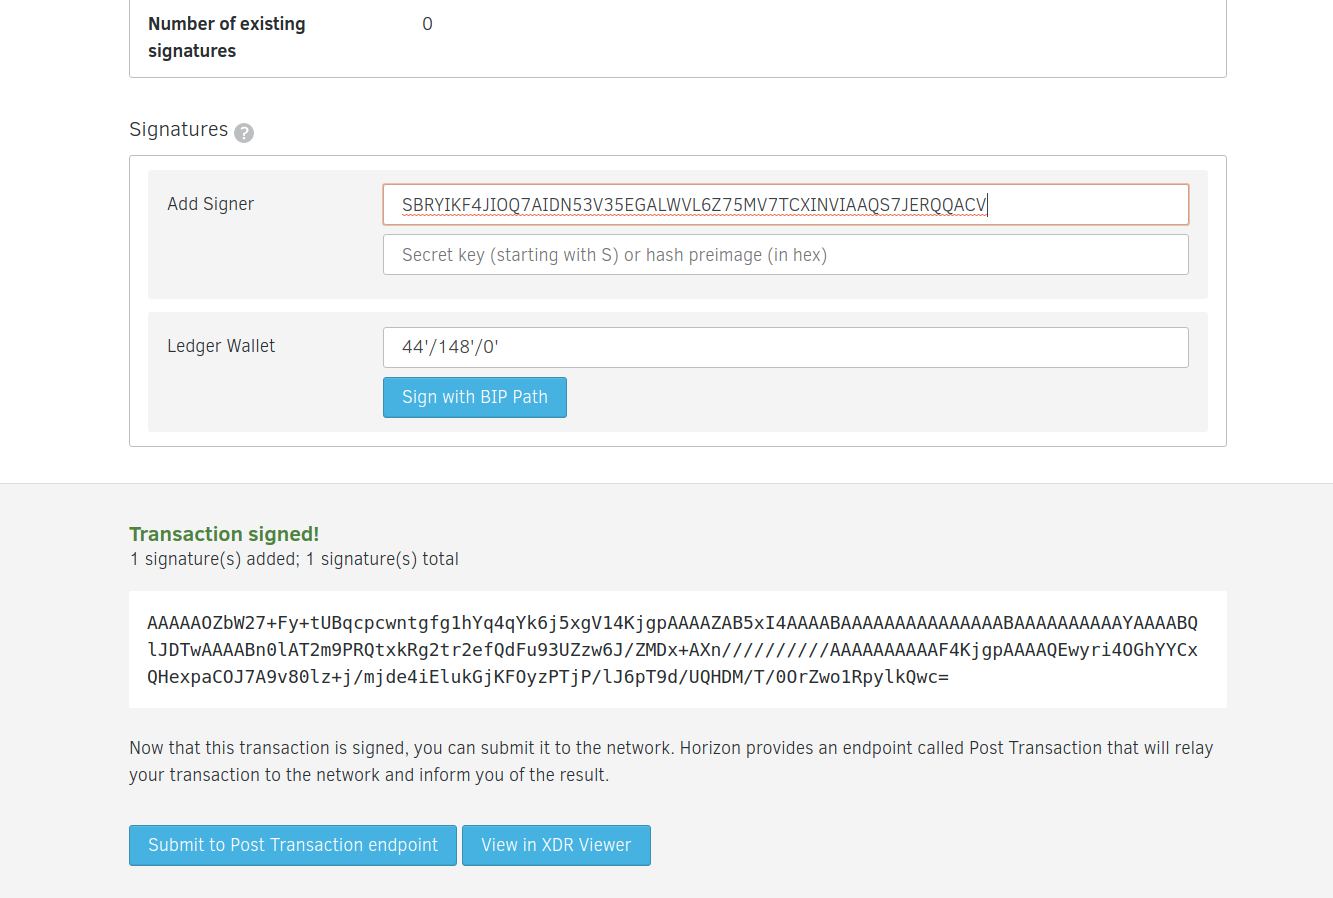
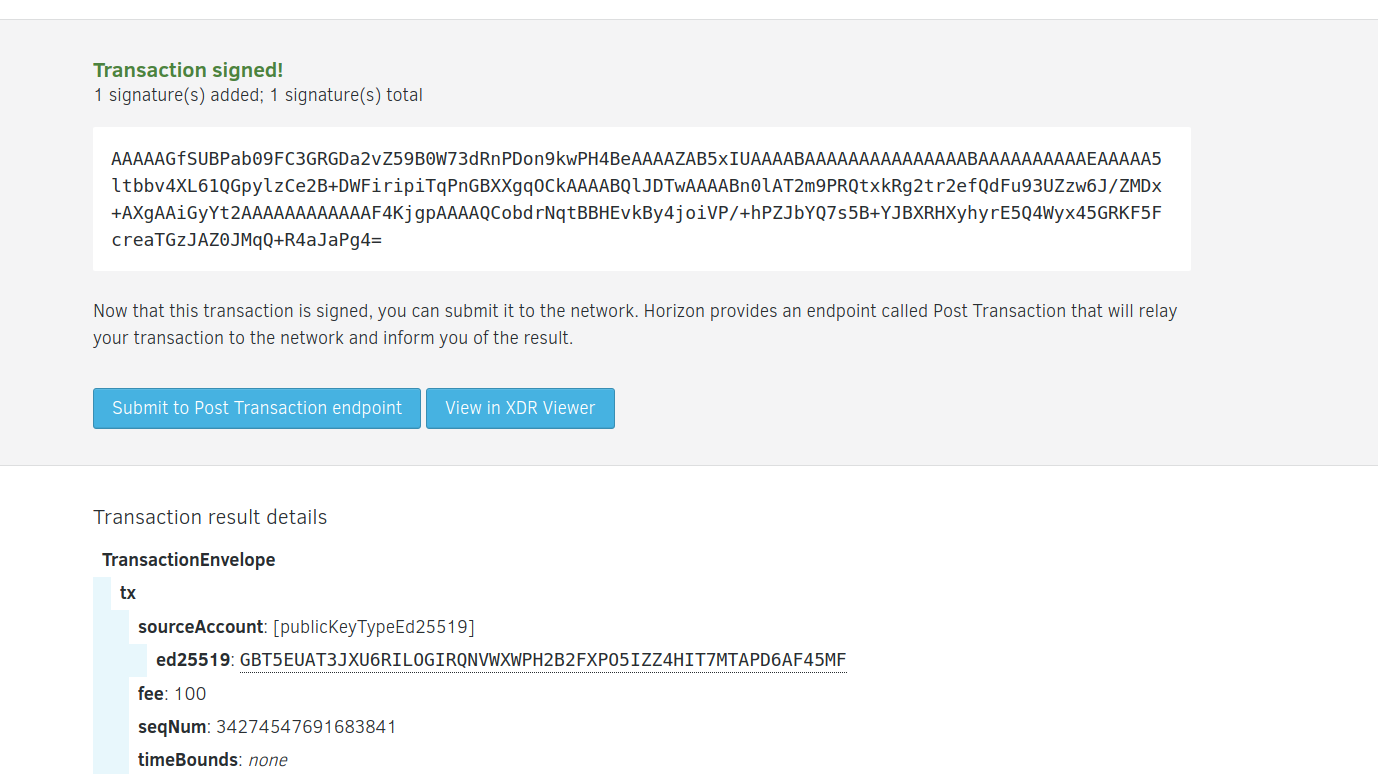
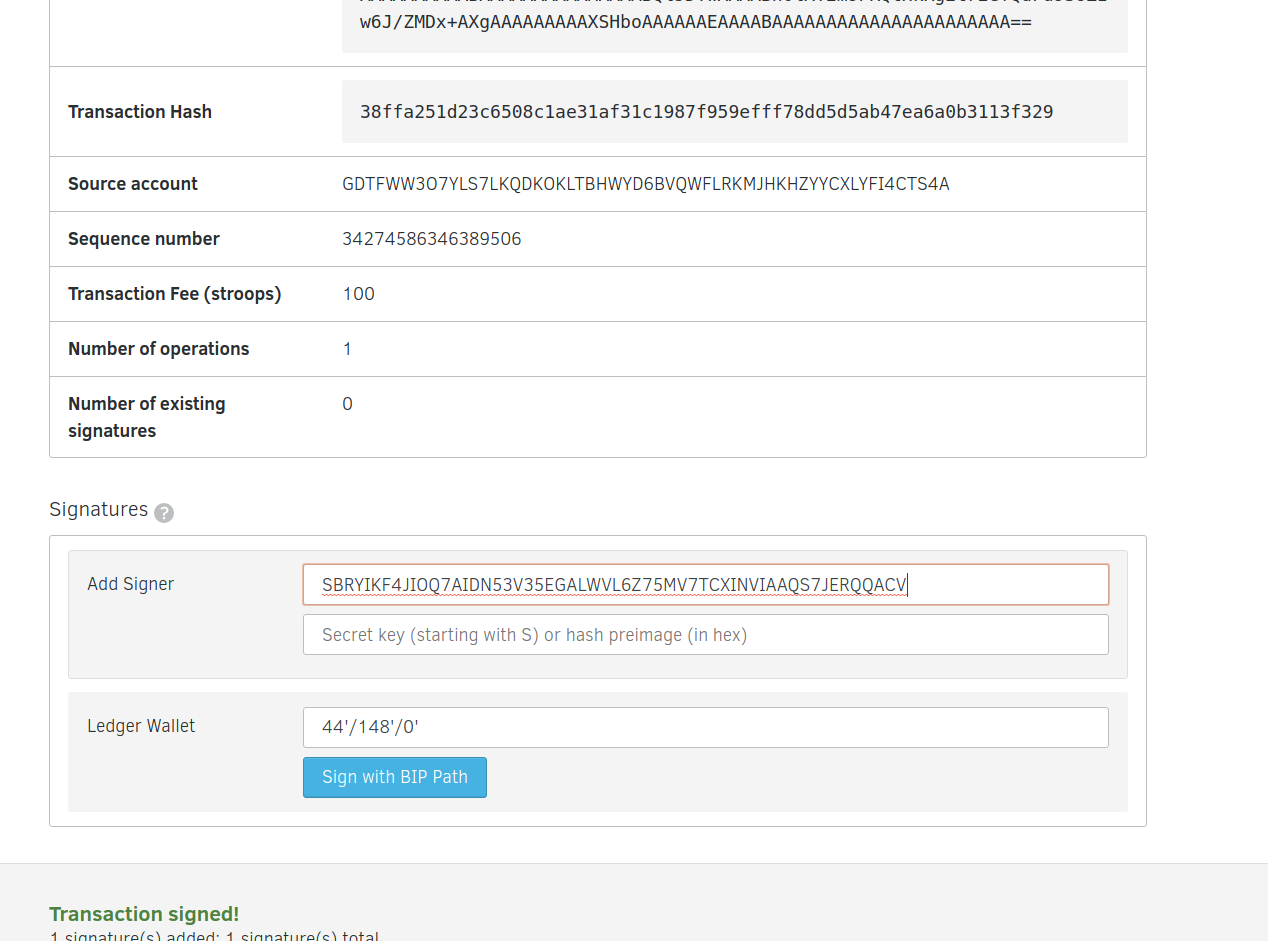
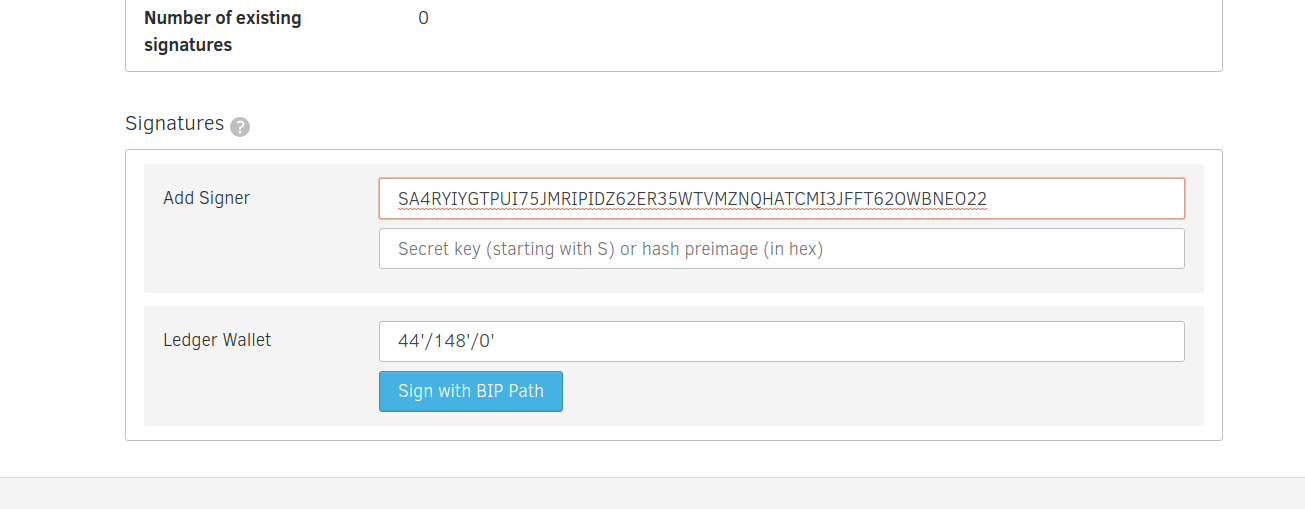
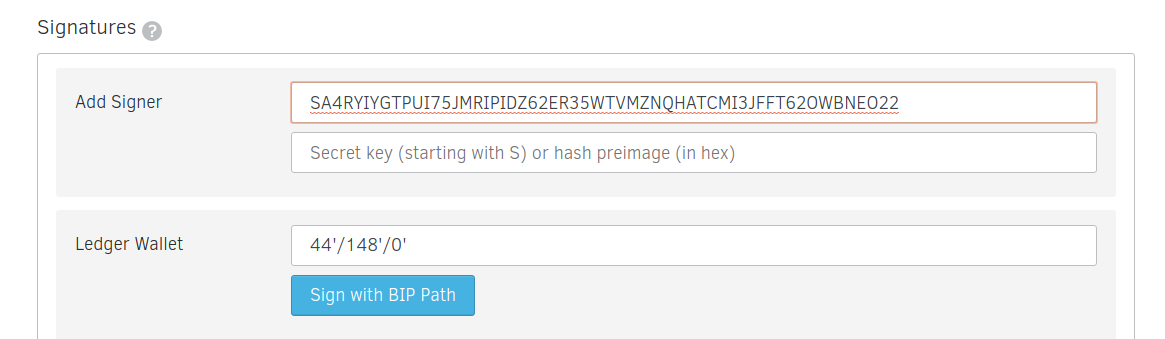
Leave the trust limit blank and sign the transaction by clicking on the “Sign in transaction Signer” button.
Sign with your distributing account’s secret key.
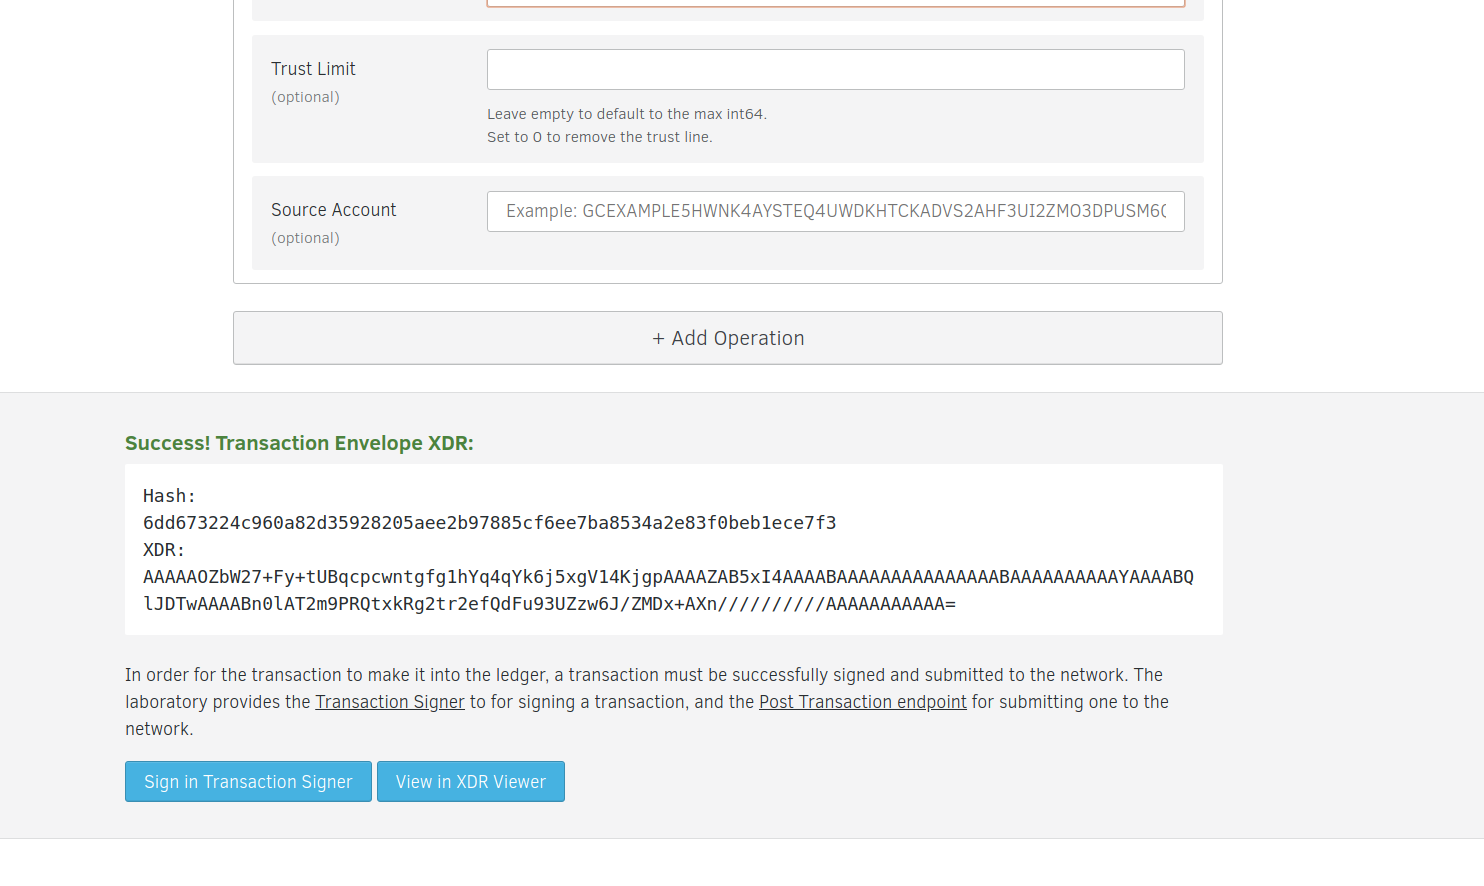
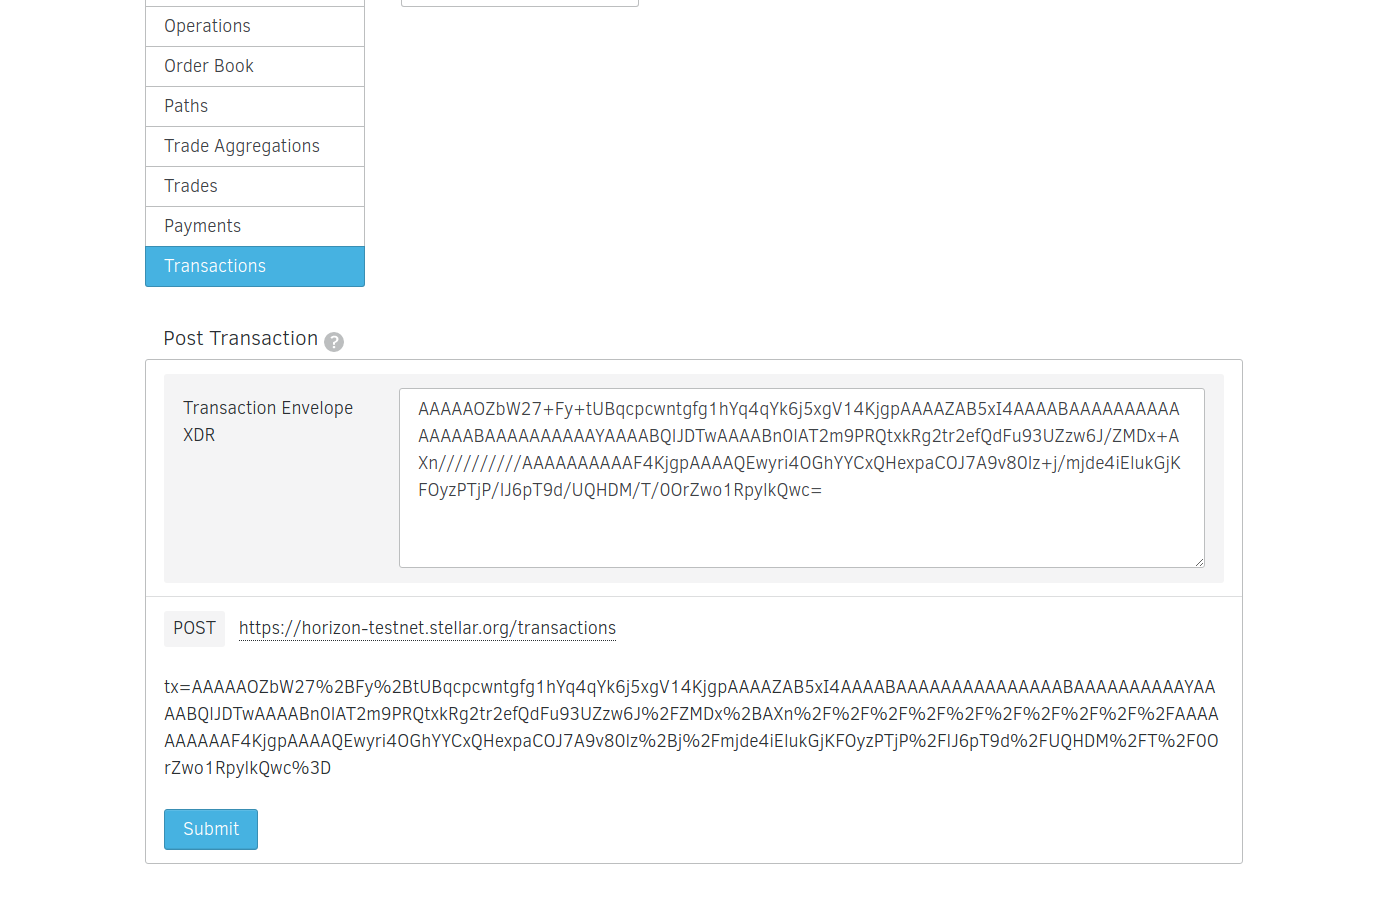
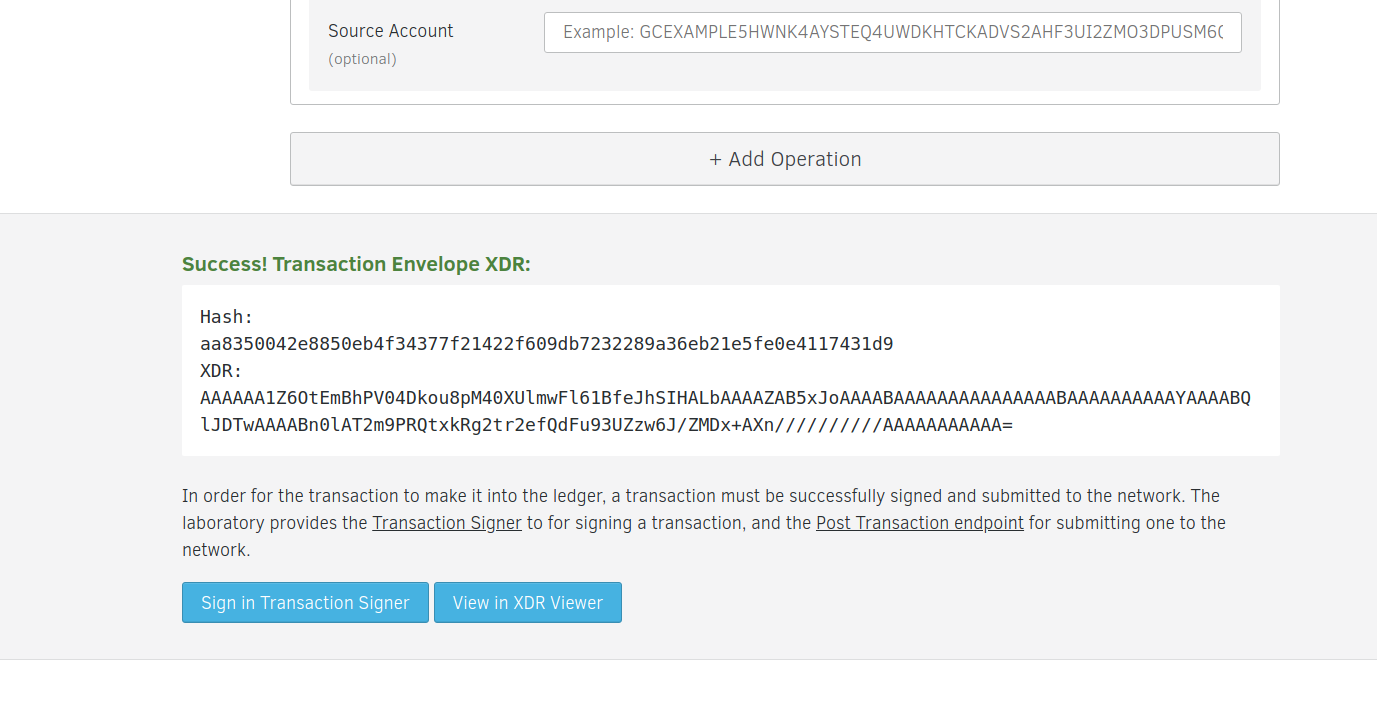
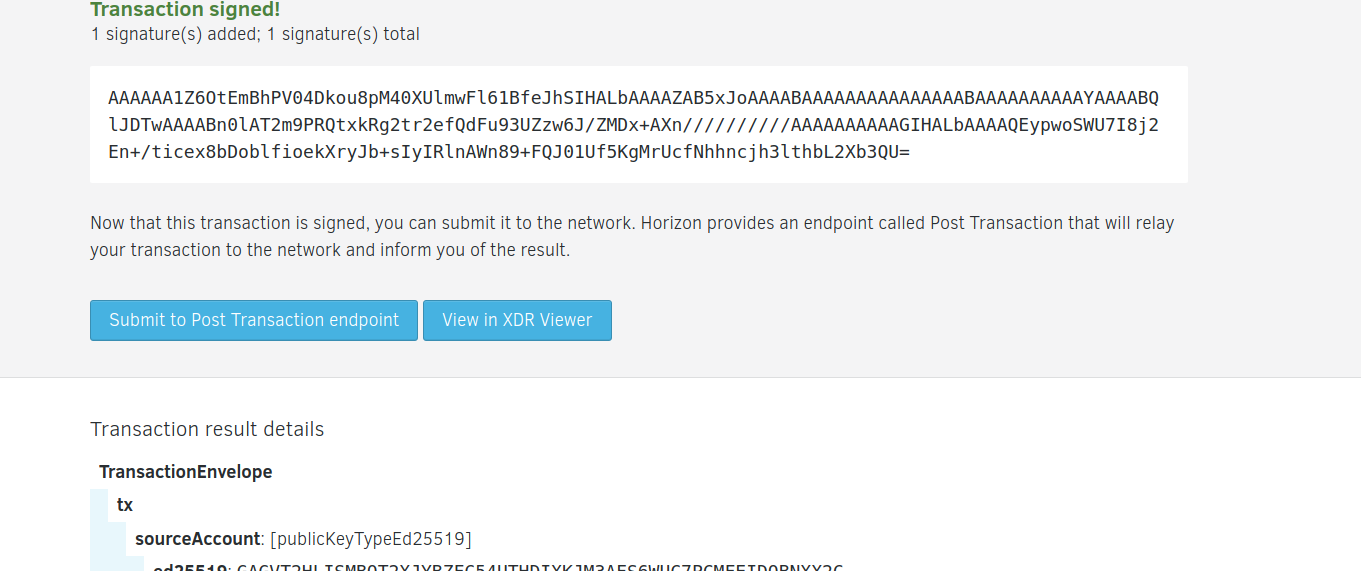
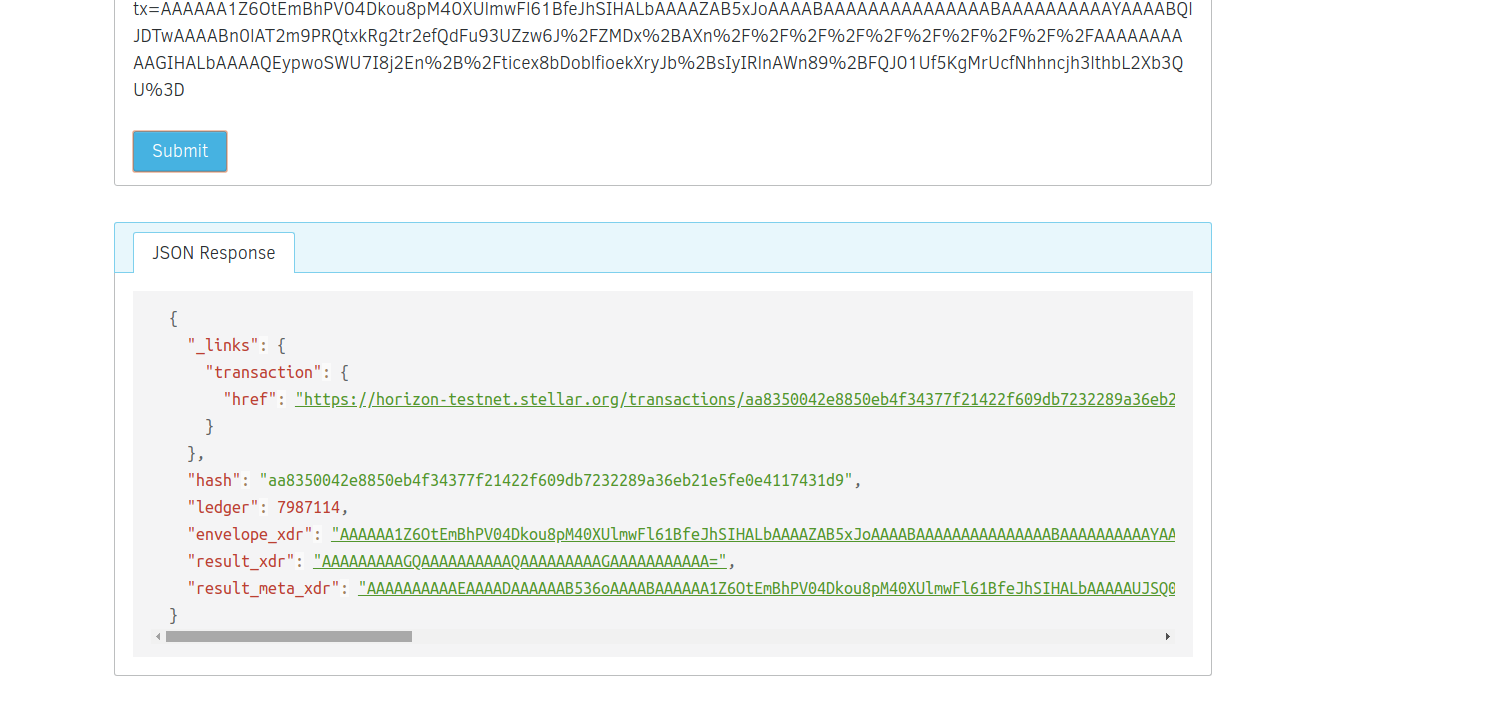
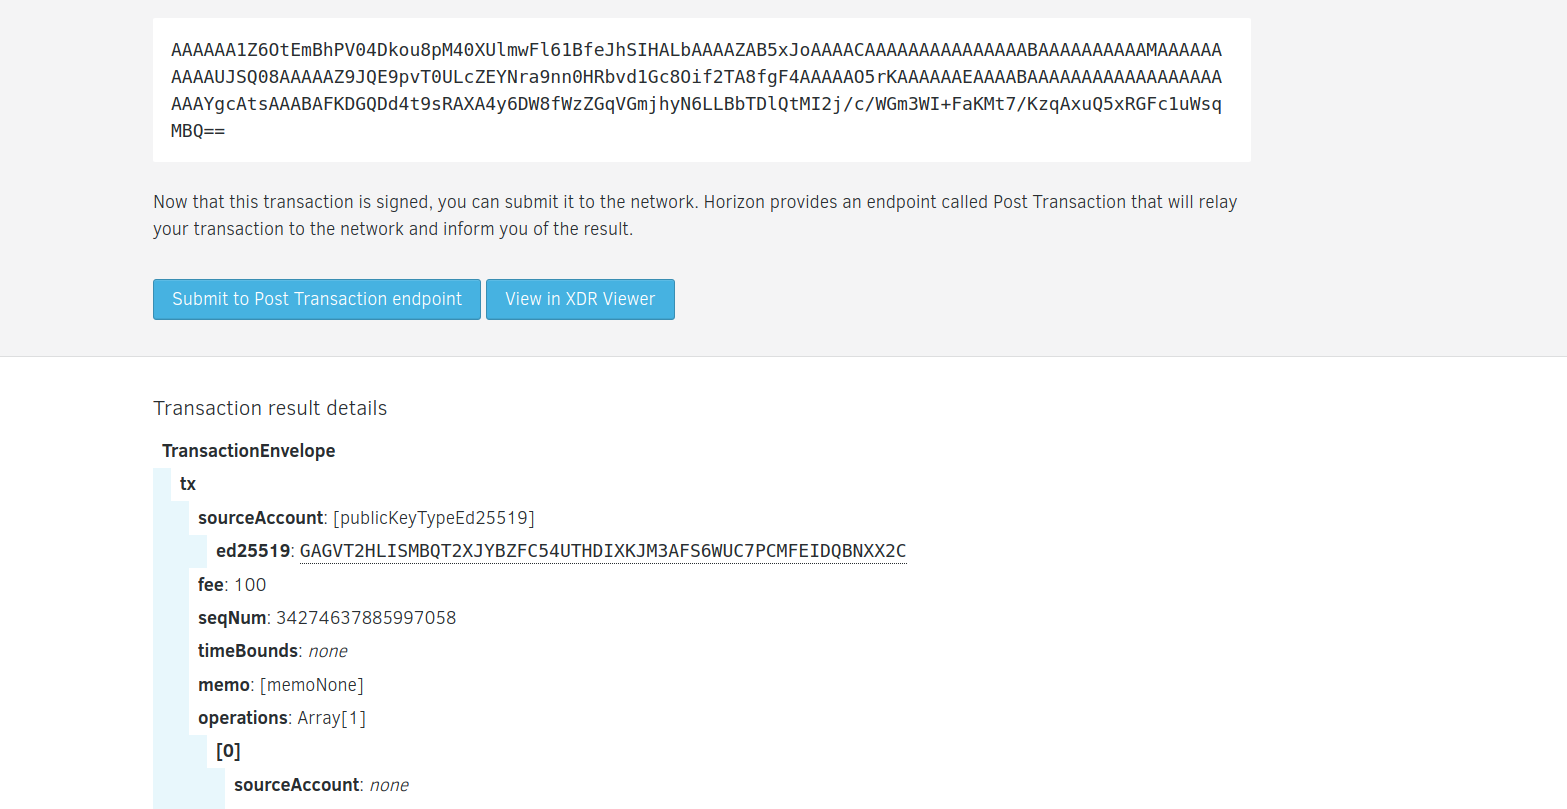
Click the Submit to post transaction endpoint button
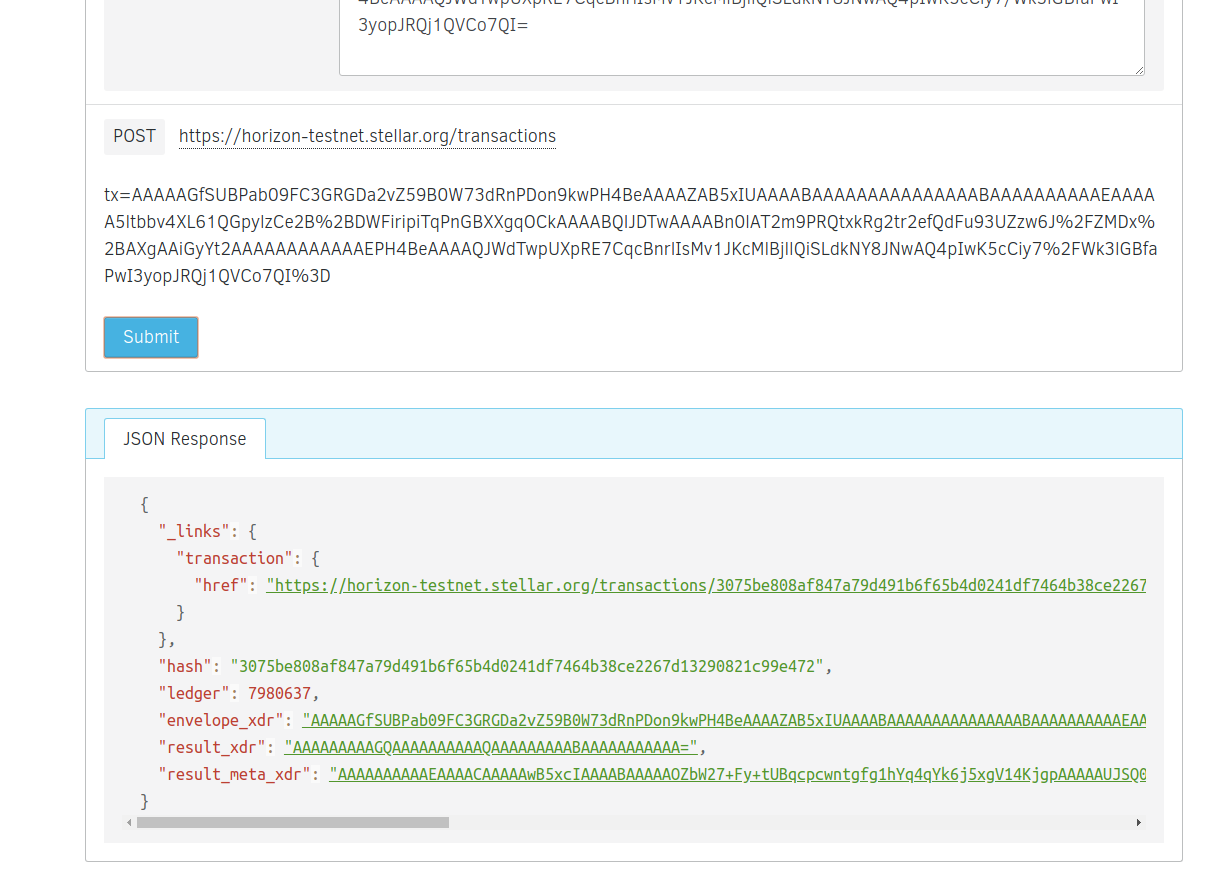
You should be redirecred to the page below. Click the submit button and you should be good.
If it succeeds, the json response should be in a normal grey color. Otherwise, if the whole step 2 doesn’t succeed, the json response at the bottom will have a red outline.
3. CREATING THE TOKENS
Head over to the stellar labs transaction builder. We’ll use this to fill out a form that’ll issue tokens from our issuing account to the distributing account.(https://www.stellar.org/laboratory/#txbuilder?network=test).
Use the Issuing account’s public key as the source account.
Click the “fetch sequence number ..” to get the next sequence number for your account.
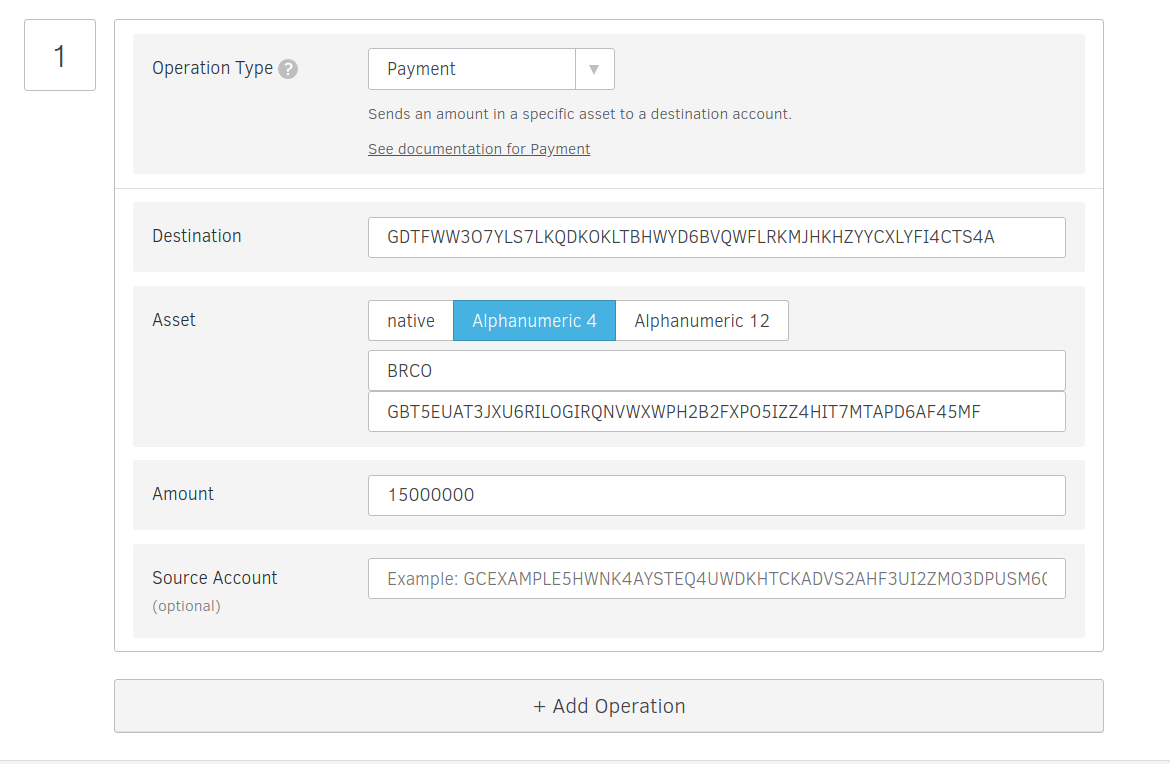
Leave the next few options blank and skip over to the operation type and select Payment.
Set the Distributor’s public key as the destination
Set the asset you used in step 2 and set the issuing account’s public key as the issuer account id.
Set the amount to any number eg. 15000000
Leave the Source account blank and click the Sign in Transaction Signer button.
Sign with your issuing account’s secret key.
Click the Submit to post transaction endpoint button
You should be redirecred to the page below. Click the submit button and you should be good.
If it succeeds, the json response should be in a normal grey color. Otherwise, if the whole step 2 doesn’t succeed, the json response at the bottom will have a red outline.
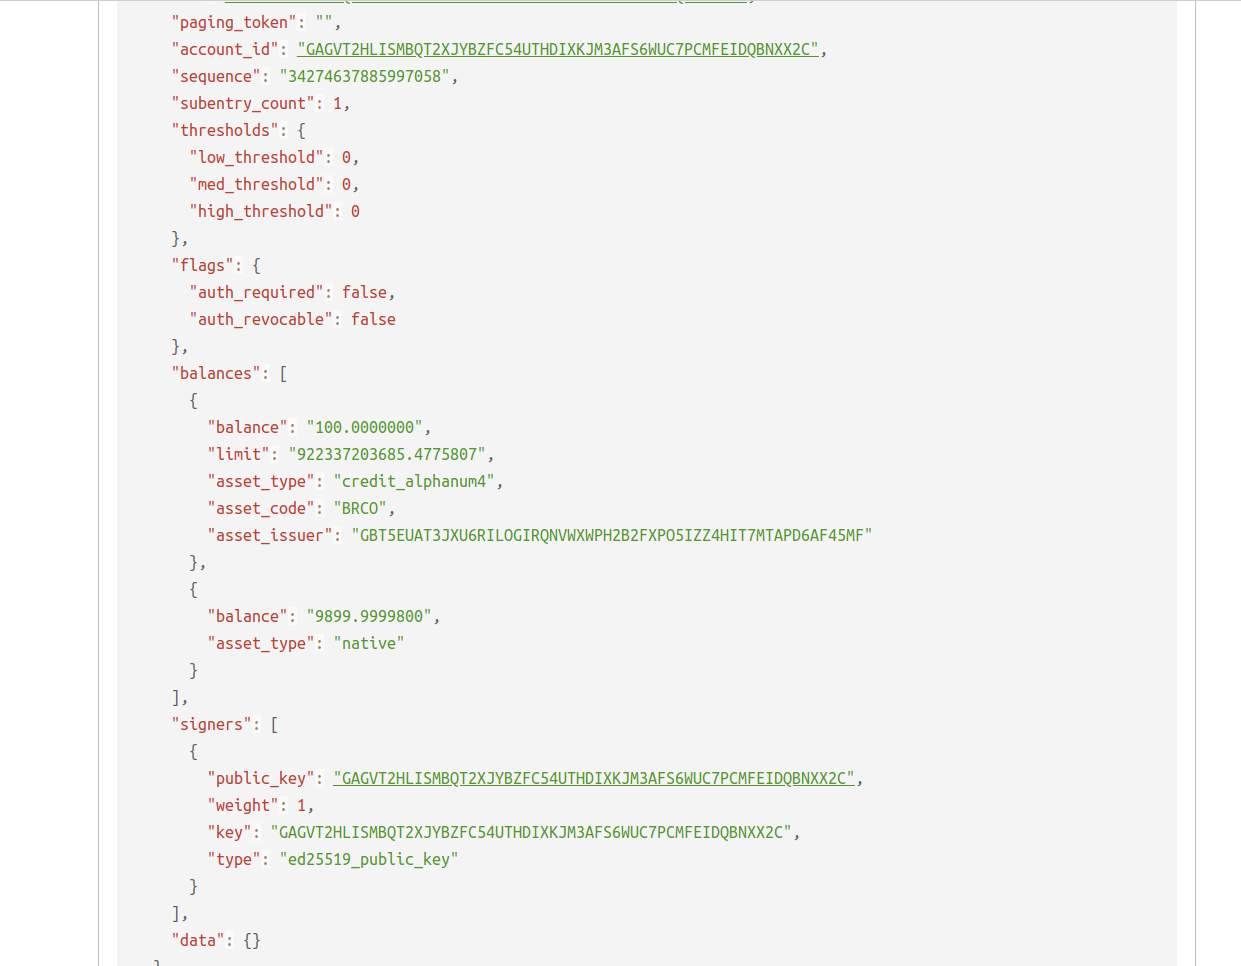
To test whether the process succeeded, explore your Distributor account here and you should see the payment we just made (https://www.stellar.org/laboratory/#explorer?resource=accounts&endpoint=single&network=test). Submit your distribution Public Key as the account id.
4. Publishing information about your token
This step isn’t necessarily important an thus can be skipped. Detailed information on how to do it can be found on here(https://www.stellar.org/blog/tokens-on-stellar/)
5. LIMITING THE SUPPLY
We don’t wish to limit the supply of our coin but in-case you do, here’s a link to how you can achieve this (https://www.stellar.org/blog/tokens-on-stellar/)(https://goolge.io/post/launching_stellar_ico/)
6. DISTRIBUTING YOUR TOKEN
The next step is to get the token into the people’s hands
Head over to the stellar labs transaction builder. We’ll use this to fill out a form that’ll distribute from our distributing account to the anyone in the general public.(https://www.stellar.org/laboratory/#txbuilder?network=test).
Use the Distributing account’s public key as the source account.
Click the “fetch sequence number ..” to get the next sequence number for your account.
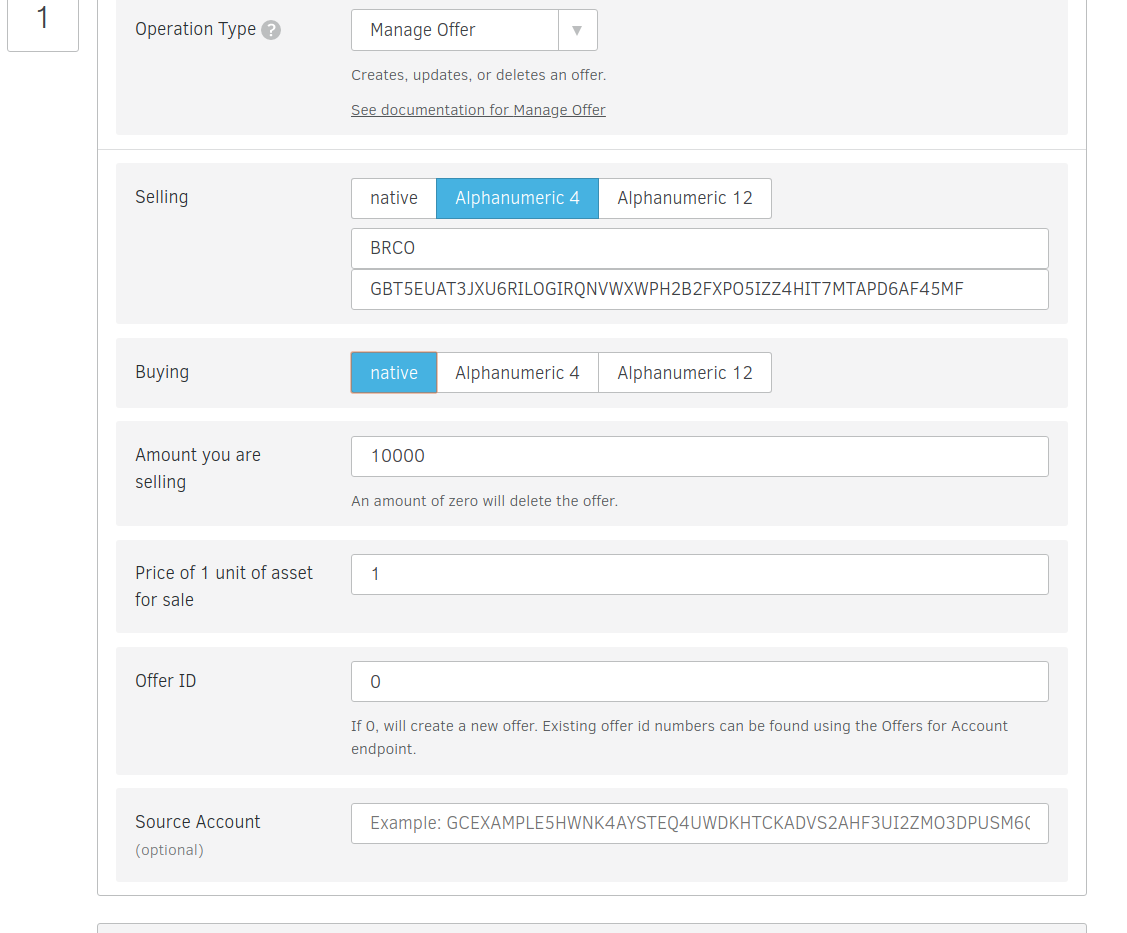
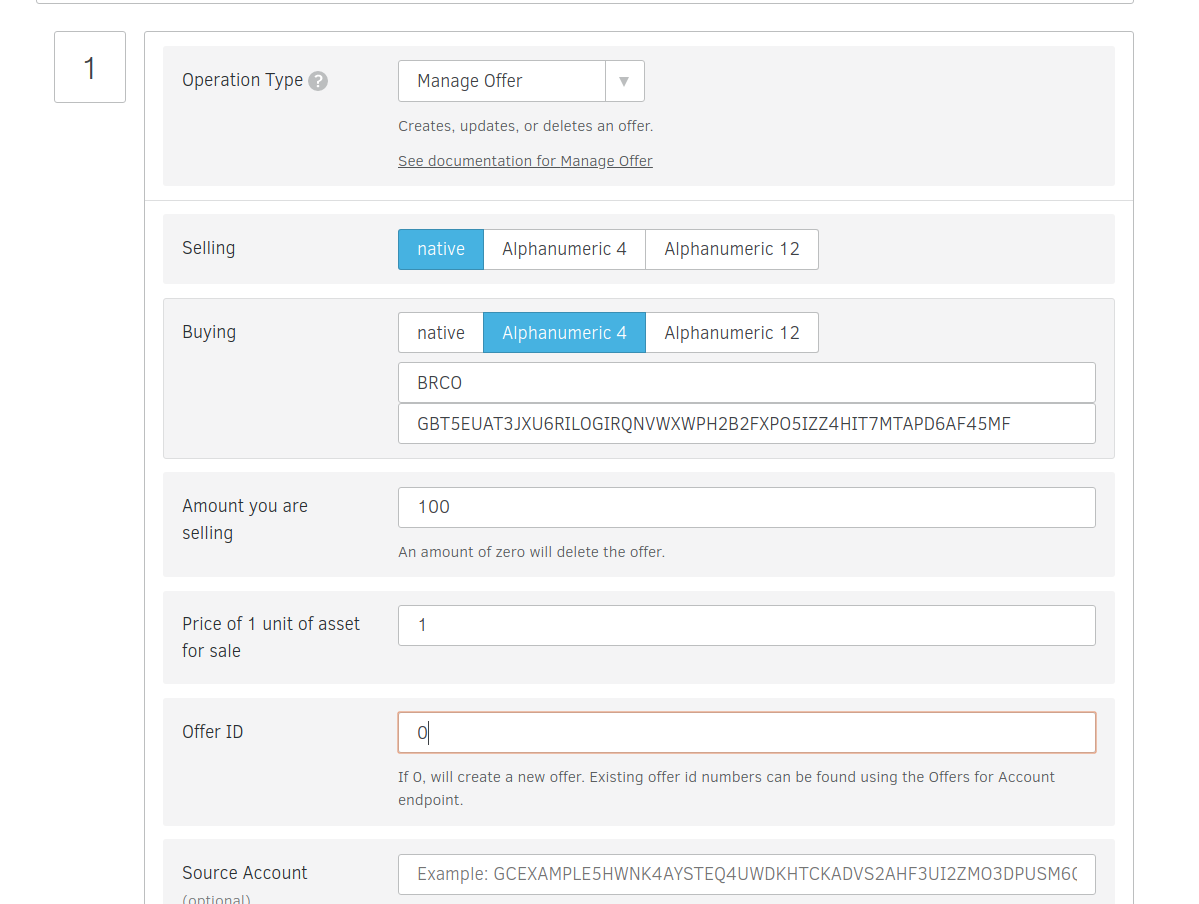
Leave the next few options blank and skip over to the operation type and select Manage Offer.
In the selling section , Set the asset you used in step 2 and set the distributing account’s public key as the issuer account id.
Since we want people to buy our tokens using XLM, set native under buying
Set the amount you are willing to sell eg. 10000
We will be selling 1 BRCO for 1 XLM so set the Price of 1 unit of asset for sale to 1.
Set the offer id to 0.
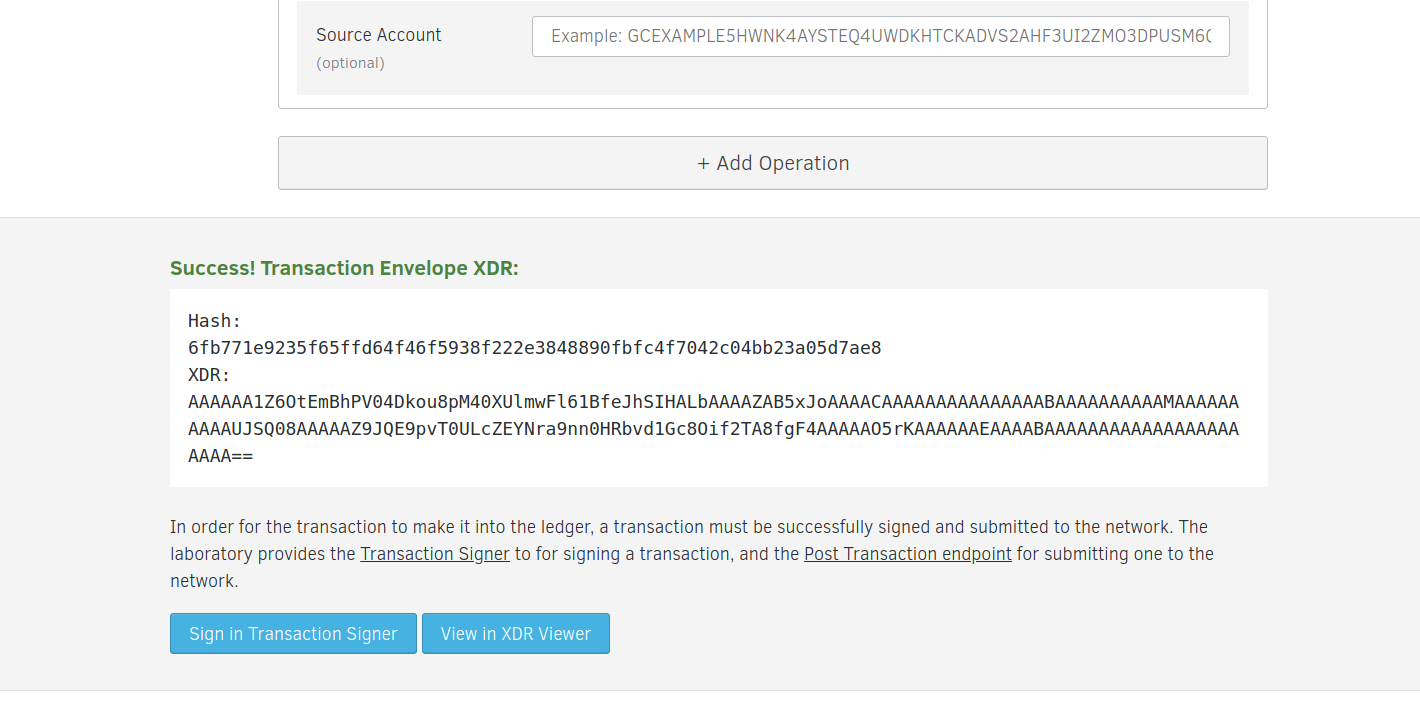
Leave the Source account blank and click the Sign in Transaction Signer button.
Sign with your distributing account’s secret key.
You should be redirected as in previous steps. Click the post button and you should be good.
If it succeeds, the json response should be in a normal grey color. Otherwise, if the whole step 2 doesn’t succeed, the json response at the bottom will have a red outline.
7. BUYING THE TOKEN
Anyone willing to buy the token has to trust the issuer first.
Add your transaction to the trustline buy heading over to the stellar labs transaction builder.(https://www.stellar.org/laboratory/#txbuilder?network=test)
Use the Investor account’s public key as the source account.
Click the “fetch sequence number ..” to get the next sequence number for your account.
Leave the next few options blank and skip over to the operation type and select change trust.
Set the asset you used in step 2 and set the issuing account’s public key as the issuer account id.
Leave the Source account blank and click the Sign in Transaction Signer button.
Sign with your Investor account’s secret key anc then click the button “Submit to post transaction endpoint”.
You should be redirecred to the page below. Click the submit button and you should be good.
If it succeeds, the json response should be in a normal grey color. Otherwise, if the whole step 2 doesn’t succeed, the json response at the bottom will have a red outline.
Now to buy the actual tokens:
Head over to the stellar labs transaction builder. We’ll use this to fill out a form that’ll buy tokens the distributing account to the distributing account.(https://www.stellar.org/laboratory/#txbuilder?network=test).
Use the Investor account’s public key as the source account.
Click the “fetch sequence number ..” to get the next sequence number for your account.
Leave the next few options blank and skip over to the operation type and select Manage Offer.
In the selling section , Set the native.
Since we want to buy the BRCO,select alphanumeric 4 and set your token ie. BRCO.
We will be buying 1 BRCO for 1 XLM so set the Price of 1 unit of asset for sale to 1 and set the issuing account’s Public Key as Issuer Account ID
Set the amount you are selling to 100 then Set the offer id to 0.
Leave the Source account blank and click the Sign in Transaction Signer button.
Sign with your Investor account’s secret key and submit to post transaction endpoint.
To test whether the process succeeded,and the investor was able to buy the new tokens, explore your investor’s account here and you should see the offer we just made (https://www.stellar.org/laboratory/#explorer?resource=accounts&endpoint=single&network=test). Submit your investor Public Key as the account id.
For a more detailed article into how you can implement the steps below without the form and using POST and GET requests, head over to my other article where I’ve tried to explain each step in detail
8. FAQs
Why does stellar require two seperate accounts ?
The issuing and distributing accounts are required to help one balance their books better. We dont have to use 2 accounts and can use just one, but the problem is that we won’t be able to balance out books very well. We’ll be using just one account to mint new tokens, tokens from other people will be coming into this account,and we’ll still be using the same account to distribute the tokens. To keep things more organised, the issuing account will only transfer newly minted tokens to the distributing account and then the distributing account can transact with other accounts, eg. the investor account we created so as to test whether a random account/user on the stellar account can buy our BRCO tokens.
How I bought my first lumens - A detailed guide on how this can be done can be found here (https://aeonsoftware.github.io/2018/03/19/buying-your-first-lumens.html)